Chapter 11 — Printing
Scene Cards can print the scene wall as a grid of cards. You choose between six cards per A4 page or one card per A6 sheet. The printout is useful for pinning to a physical wall, sharing with crew, or sending as a PDF. This chapter covers starting a print job, what appears on each card, saving to PDF, and what cannot be printed in the current version.
11.1 Printing the Wall
11.1.1 Starting a print job
Three routes reach the print dialog:
| Route | Action |
|---|---|
| Menu | File → Print Wall Layout… |
| Keyboard | ⌘P |
| 📐 iPadOS toolbar | ⋯ → Print… |
Both platforms open the standard system print dialog — macOS shows the native print panel; iPadOS shows the print sheet. From there, choose a printer, set the number of copies, and print.
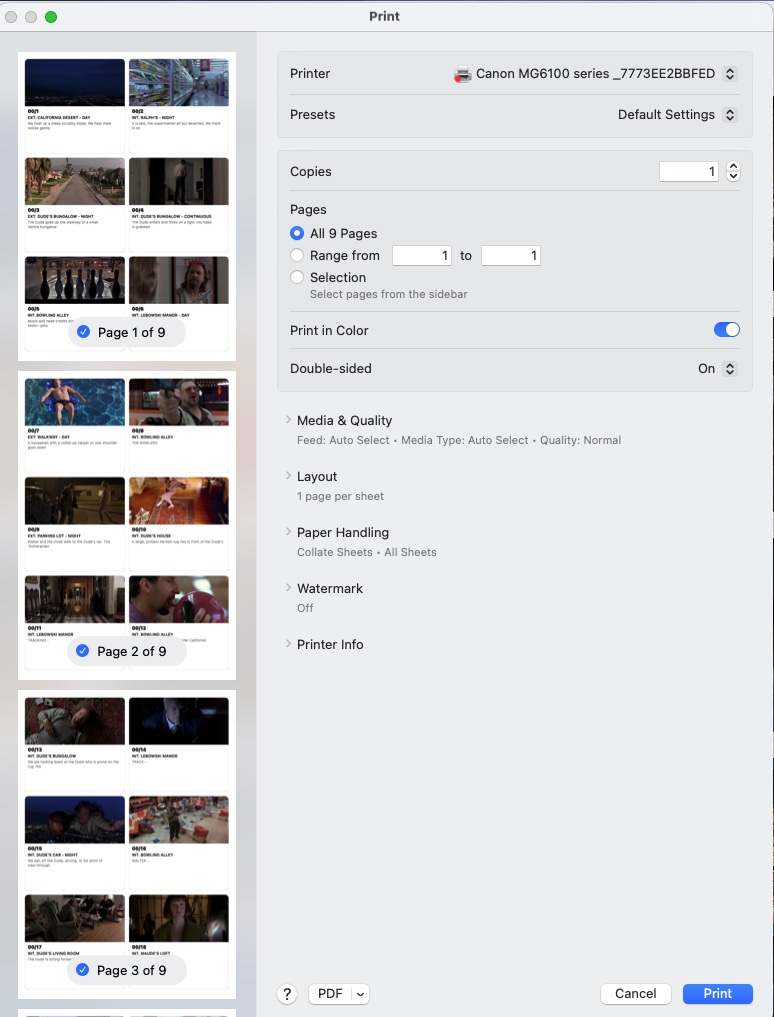
11.1.2 What each card shows
Each printed card contains, from top to bottom:
| Element | Notes |
|---|---|
| Still image | Fills whatever height the text below leaves over; absent if no still is attached |
| Scene number | Episode and scene (e.g. 02 / 15, 02 / 15A OMITTED) — omitted cards are skipped by default; when included (§11.1.3) they print with their OMITTED label |
| Scene heading | The full script heading (e.g. INT. OFFICE — DAY), never truncated; falls back to the Location field if the card has no heading |
| Action | Up to four lines, in smaller grey text |
When a card has a still, the text is measured first and the image absorbs the remaining height — a long heading shrinks the image rather than being cut off. The image always keeps at least 30% of the card.
Card borders are rounded. The background is white. There is no colour coding in the current print layout — revision colours and badge icons do not appear.
11.1.3 Print options
When you start a print job, an options sheet appears before the system print dialog.
Layout — choose one of two layouts:
| Layout | Paper | Grid | Use case |
|---|---|---|---|
| 6 per page | A4 portrait (210 × 297 mm) | 2 columns × 3 rows | Overview sheets, pinning to a physical wall |
| 1 per page | A6 (105 × 148 mm) | 1 card per sheet | Index-card-sized handouts, sorting on a desk |
Skip omitted scenes — on by default. Filters OMITTED cards out of the printout so they don’t clutter the wall. Turn it off to print omitted cards with their OMITTED label.
Episodes — shown only when the document contains more than one episode. Tick the episodes to include; at least one must be selected before Print is enabled.
Both layouts print cards in wall slot order (the same left-to-right, top-to-bottom order you see in Scenes mode). Margins run to the printable area edge.
11.1.4 Which mode to be in
The print job always uses the Scenes mode wall grid. Switch to
Scenes mode (⌘⇧1) before printing.
ⓘ Note — Schedule mode and Locations mode are not printable in the current version. The print command is available from any mode, but the output is always the Scenes wall. To print a shoot schedule, print the one-liner PDF directly from its source app.
11.2 Saving to PDF
There is no dedicated “Export PDF” command. Use the system print dialog instead:
🍎 macOS — in the print dialog, click the PDF pop-up menu at the bottom-left and choose Save as PDF…. Name the file and save.
📐 iPadOS — in the print sheet, pinch to zoom the preview — this converts the job to a PDF in a preview sheet. Tap the share button (⬆) to save to Files, send by AirDrop, or attach to an email.
The resulting PDF matches whichever layout you chose — six cards per A4 page or one card per A6 page, in slot order.
11.3 Where to Go Next
- Sharing the document itself — the
.scenecardspackage can be shared directly from the Files app (📐 iPadOS) or Finder (🍎 macOS). See §4.7. - Reference files — stills and documents attached to cards do not appear on the printed wall. To share them, use the share sheet in the inspector (§8.4.4).
- Import Project Data — to hand off a wall to a colleague as a Scene Cards document, see §12.